Private vs Public network profile in windows machine
Let's start with the coffee shop example. If you are connected to the network-like those in coffee shops or train station, you don't want anyone to see your PC as well as sharing some information with them. There can be someone who is scanning the network and trying to get your information. For this situation, you can configure windows to work in public network profile. It will basically hide your computer on the network.
Another example will be the network such as Home network (assuming that the device connections are secure ). Here, you may want to share the information between different computers. For this, change the network profile to private. Windows will automatically enable network discovery features. Another device can see your PC allowing for easy file sharing.
Now, if you want to change from private to public or vice-versa, you can switch them very easily. Windows will normally ask the first time if network discovery is to be enabled. If you select yes, windows will set network as private. In case, you missed this chance to make private network profile, use the following steps:
You will see an error about Network discovery

Click OK
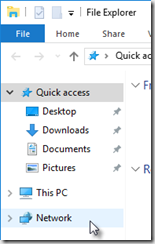
At the top of the window, you will see a Network discovery message
![]()
Click it and select Turn on network discovery and file sharing

Click No

Now your network is private

In addition, you can change these settings as shown below:

Note: I was having a problem with DNS resolution. I changed my server network profile from public to private. After this change, DNS server can find my server and I was able to connect remotely using hostname also.